


Shogun
-
Posts
1361 -
Joined
-
Days Won
77 -
Feedback
0%
Content Type
Forums
Store
Third Party - Providers Directory
Feature Plan
Release Notes
Docs
Events
Posts posted by Shogun
-
-
2 hours ago, arves100 said:
Amazing tutorial, thanks for sharing.
I'd say you miswrote "sql-mode" and "log-bin" file, they should go in my.cnf

Fixed thanks
-
-
Really nice work
-
 1
1
-
-
Nothing happened to WoM2, it's at it's best moment in years. WoM3 was closed.
-
Hi everyone,
Since I have just set up a new server using the latest versions of both FreeBSD, I took the chance to come back and make a little contribution to my old forum.
NOTE: MySQL 5.7 and newer deprecate the PASSWORD() function and thus requires changes on the source and on your website code. Install MySQL 5.6 instead if you are not ready for this - these instructions should work just fine with it, except for the my.cnf path
1. Physical server setup
I divided this guide into three parts; hardware setup, OS and MySQL.
Previous to the configuration of the OS we will have, of course, rented our server and set up some partitions. In my case, it's a server with 64 GB RAM and 2 NVMe disks. NVMe disks are the fastest in the market, performing even better than SSD. As for the OS, my provider, a very popular french company, offers only one BSD option - a premade template using Freebsd 11.3 ZFS, which I chose. Next I opted for ENglish and "set custom partitions".
In the partition setup screen, I decide to assign MySQL its own partition on /var/db/mysql, with roughly three quarters of the space available (400 GB) and leave the rest for everything else. Finally I set a 2GB swap partition. Note that since we are using a RAID setup, the space taken by our partitions show as double.

[A RAID, to explain it in layman terms, is a number of hard drives, all containing the same data, working simultaneously - so if one of them fails, the server can continue to work until the faulty disk is replaced and no data or uptime is lost. The downside is that the extra hard drives don't give us any extra space, a price that is worth paying for mission critical applications like this]
Having MySQL in its own partition is not strictly needed so if you don't know how much space your MySQL partition will need, just make one big partition for everything (Mountpoint "/") and delete the default "/home" partition which is of little use for us. Remember to use the arrow icon when you set up your last partition to make sure you're using all the available space left!
Once done here, enter a hostname for your server and let it get installed. Once completed, you will receive an e-mail with the root password, which you can use to connect to your server through putty on port 22. I won't explain here the usage of putty.
2. Upgrading to latest FreeBSD
2.1 Standard upgrade procedure
I have highlighted the word upgrade so you notice we are talking about updating the whole kernel here to a new version - thus, an upgrade. Once we logged in, it's time to update our server to the latest FreeBSD release which at the time of writing this post is 12.1, but do check here first: freebsd.org
freebsd-update upgrade -r 12.1-RELEASEFollow the on screen instructions. We have a clean system, so when asked "Does this look reasonable?" feel free to answer y as we are not going to break anything at this point. However, if you upgrade an existing server you should check each file that is being changed, assuming you know what those changes mean of course.
You will be eventually shown, as in every OS update, a list of files to be updated - just type :q and enter to keep going. Finally you will be prompted to type "freebsd-update install" and, after the installation is done, to reboot. Now we are supposed to rebuild our ports, since we did not install anything yet and there is nothing to rebuild we will ignore this step; otherwise, rebuild your ports or upgrade your packages using either "portmaster -GaD" or "pkg update".
Finally we will type
freebsd-update installand we will have our new version of FreeBSD ready to use.
2.2 Standard update procedure
If you are using OVH, it's time now to change your repositories since OVH does not provide updates for FreeBSD 12 in their custom repos yet, so we will be pulling our updates from the standard FreeBSD repositories instead. The downside is that we won't be able to use OVH's Real Time Monitoring system, but in my experience it is not of much use anyway. So let's do this:
ee /usr/local/etc/pkg/repos/FreeBSD.confIf the file is empty, paste the following text:
FreeBSD: { url: "pkg+http://pkg.FreeBSD.org/${ABI}/latest", mirror_type: "srv", signature_type: "fingerprints", fingerprints: "/usr/share/keys/pkg", enabled: yes }Now let's disable OVH repos:
ee /usr/local/etc/pkg/repos/OVH.confAnd change both instances of "enabled: yes" to "enabled: no". If OVH adds FreeBSD 12 repositories to their repos at some point, you can always revert this change in the future.
And now it's time to test updating our system works:
portsnap fetch extract pkg update pkg upgradeIf you just installed version 12.1 of FreeBSD like me it's possible that pkg is not working for you either. The solution is the following:
pkg-static install -f pkgThen you should be able to run pkg normally.
2.3 Rebuilding databases
Some system databases need to be rebuilt after a change, such as the changes resulting in a release upgrade like the one we just made. Also, we want to add our e-mail to receive root e-mail messages which may be important.
ee /etc/aliases
under:
# root: [email protected]add:
root: [your email]Save and exit, and then let's sync the users database:
newaliases /usr/sbin/pwd_mkdb -p /etc/master.passwd2.4 Set up sendmail
By default, FreeBSD generates audits periodically which can alert us to issues in our system (see crontab). So we will have them forwarded to our email.
ee /etc/crontabWe add at the top:
MAILTO=[our email address]This forwards the cron output to our chosen mail address.
Now to basic sendmail setup:
cd /etc/mail/certs openssl dhparam -out dh.param 4096NOTE: if you run your own mail server, you should add it as a smart host for sendmail; take a look here: https://lists.freebsd.org/pipermail/freebsd-questions/2004-February/035329.html
Check /var/maillog to make sure everything works.
(Be aware that your mail server might not like some random unknown server sending e-mail to it, so receiving them may require some work.)
2.4 Weeding out issues
Version 12 being quite new, we will find some things are a bit buggy. These actions are not (should be not) part of the installation process, but are particular issues encountered with version 12.
I got some error message with Perl 5.30 while building ports so I installed it from ports and the problem is gone:
cd /usr/ports/lang/perl530 && make install cleanAnother error was caused by SSL missing, so I installed OpenSSL to solve it:
pkg install opensslAnd added this lime in /etc/make.conf so the ports stop complaining when building. /etc/make.conf does not exist in the base install, so just create it.
DEFAULT_VERSIONS+=ssl=openssl2.5 System tuning
There are hundreds of guides in the internet about tuning this or other sysctl setting on FreeBSD. Take them with a pinch of salt as they may not be appropiate to your FreeBSD version, and the default settings change in every version, potentially leaving former tuning settings obsolete. Here are a few ones that are proven to apply to this specific case:
in /boot/loader.conf
# prevent swapping by mysql - set this to a quarter or half of your RAM - ZFS only! vfs.zfs.arc_max="16G"In /etc/sysctl.conf
kern.ipc.soacceptqueue=512 # max incoming TCP connections (default is 128, not very good in case of DDoS) compat.ia32.maxdsiz=2147483648 # compatibility for 32 bit appsFinally, if you want to have a firewall, you may want to install pf. I think I made a guide at some point, in any case it's beyond the scope of this tutorial.
On a production server, you should also set up ssh key authentication and log in through an user specially created for running your Metin server. Remember to add this user to the wheel group so you can su into root from it as necessary; thereafter you can disable password authentication altogether in /etc/ssh/sshd_config. There are plenty of guides as well on how to do this, as it's a very standard procedure in the Unix world.
3. Installing MySQL 8
3.1 The installation itself
Allright so far so good. Now it's time for MySQL 8. I have no idea why they decided to jump from 5.7 to 8 straight away, but it seems MySQL 8 does better on benchmarks than the previous versions. So I will attempt to run Metin on it.
pkg install mysql80-server pkg install mysql80-clientAdd in rc.conf
mysql_enable="YES"Now let's disable binary logging to save space, by commenting this line in /usr/local/etc/mysql/my.cnf
#log-bin = mysql-binAnd disable strict SQL - Metin does not like it:
sql-mode = ""At this point you should start MySQL and check everything is fine:
service mysql-server start
Note you do not need to run mysql_upgrade in this version.
Now you should import whichever data you want to import into MySQL. Do not just copy the files, use mysqldump. You should not import the mysql database if you're upgrading from older MySQL or MariaDB versions - add your users manually there.
3.2 Important changes in MySQL 8.0
Of course this version is faster and more efficient and so on, but it's not up to me to explain those changes. What I am going to go over is changes in configuration and behavior that you need to know about.
Note that MySQL 8.0 does not create passwords with the old algorithm by default. We have to enable it. Also - very important- the MySQL PASSWORD() function has been deprecated - replace it in your code if you use it (the source does use it).
Creating an user with the old password method:
CREATE USER 'nativeuser'@'localhost'IDENTIFIED WITH mysql_native_password BY 'password';Or you can set this as default in my.cnf. Note the FreeBSD port of MySQL 8 saves my.cnf in /usr/local/etc/mysql/my.cnf - instead of /usr/local/etc/my.cnf as older versions used to do.
[mysqld] default-authentication-plugin=mysql_native_password3.3 Getting my.cnf ready
If you are using the default config file supplied, make sure you set max_conections to a reasonable number, let's say 200. Optionally, we can set do some tuning as well.
# tuning for large RAM (>16GB) innodb-flush-log-at-trx-commit = 2 # safe on ZFS - may corrupt data on non journaling filesystems skip-innodb_doublewrite # tuning for fast disks. Set to 500 for SSD. Remove both lines if your disk is an old SATA drive. innodb_io_capacity = 1000 innodb_flush_neighbors = 0Here is how our my.cnf looks like with these changes. I have also commented out bind-address since I do want to connect to my database from the outside, but that may not be your case. I have also set innodb_buffer_pool to 16G and innodb_log_file_size to 4G, since I have converted the game tables to InnoDB. If you are not using innodb, you can just leave the default of 1G.
# $FreeBSD: branches/2020Q1/databases/mysql80-server/files/my.cnf.sample.in 469734 2018-05-12 15:35:25Z mmokhi $ [client] port = 3306 socket = /tmp/mysql.sock [mysql] prompt = \u@\h [\d]>\_ no_auto_rehash [mysqld] user = mysql port = 3306 socket = /tmp/mysql.sock #bind-address = 127.0.0.1 basedir = /usr/local datadir = /var/db/mysql/ tmpdir = /var/db/mysql_tmpdir slave-load-tmpdir = /var/db/mysql_tmpdir secure-file-priv = /var/db/mysql_secure #log-bin = mysql-bin log-output = TABLE master-info-repository = TABLE relay-log-info-repository = TABLE relay-log-recovery = 1 slow-query-log = 1 server-id = 1 sync_binlog = 1 sync_relay_log = 1 binlog_cache_size = 16M default_password_lifetime = 0 enforce-gtid-consistency = 1 gtid-mode = ON safe-user-create = 1 lower_case_table_names = 1 explicit-defaults-for-timestamp = 1 myisam-recover-options = BACKUP,FORCE open_files_limit = 32768 table_open_cache = 16384 table_definition_cache = 8192 net_retry_count = 16384 key_buffer_size = 256M max_allowed_packet = 64M long_query_time = 5 innodb_buffer_pool_size = 16G innodb_data_home_dir = /var/db/mysql innodb_log_group_home_dir = /var/db/mysql innodb_data_file_path = ibdata1:128M:autoextend innodb_temp_data_file_path = ibtmp1:128M:autoextend innodb_flush_method = O_DIRECT innodb_log_file_size = 4G innodb_log_buffer_size = 128M innodb_write_io_threads = 8 innodb_read_io_threads = 8 innodb_autoinc_lock_mode = 2 skip-symbolic-links # Our stuff here default-authentication-plugin = mysql_native_password max_connections = 200 # disable strict mode (doesnt play well with our queries) sql-mode = "" # tuning for large RAM innodb-flush-log-at-trx-commit = 2 # safe on zfs - may corrupt data on non journaling filesystems skip-innodb_doublewrite # tuning for ssd and nvme innodb_io_capacity = 1000 innodb_flush_neighbors = 0 [mysqldump] max_allowed_packet = 512M quote_names quickFor further tuning I recommend running mysql-tuner once in a while. It will provide us with valuable insights on our server; note that you should first let it run live so data can be gathered.
cd /root fetch http://mysqltuner.pl perl mysqltuner.plFor instructions visit
Feel free to comment on any issues you may have with my tutorial, I may try to help.
-
 83
83
-
 1
1
-
 1
1
-
 1
1
-
 1
1
-
 3
3
-
 1
1
-
 1
1
-
 32
32
-
 1
1
-
79
-
-
Nice theme, I'm glad someone has the time and will to give a facelift to the project. It was needed.
-
 1
1
-
4
-
-
Short answer, you can't. This is a generic error. For every msa file, the game will search for a matching mss file in the sound folder. The error is harmless as not all msa files are supposed to have a mss file.
-
1
-
-
Well there is no user called "core" so of course it won't work. What did you expect?
-
What do you mean with "didn't work"?
-
World Editor is the Map Editor for Metin2 and it's probably for download elsewhere in this forum. I don't have time for handholding sorry.
-
2
-
-
Open it in WorldEditor and go to the last tab (A, Attribute Map), click the Block checkmark, select "Edit", then go there and delete the are you can't walk on.
Save the map and then save server_attr so it works serverside as well.
-
1
-
-
We are using it in my server, thank you!
-
1
-
-
Dear community,
WoM3 is looking for a C++ developer to help taking the project to new heights together with our creative team consisting of 2 game designers, 3 developers, 1 mapper and 2 designers. Knowledge of python and lua will help.
We require a minimum B2/C1 level of english, experience in working in teams and collaboration tools such as git is a plus.
We offer: full or part time position in a fun and creative work environment and a salary to match your skills.
Interested? write to me on [email protected]
-
3
-
-
That's my avatar in the WoM forum
 cool idea with the ouroboros
-
2
-
-
The launch has been an incredible success beyond our wildest expectations with 10.000 players online daily. Who said Metin2 was dead?
-
4
-
-
GAME DESIGNER WANTED!
You will be the Game Designer of a new and improved WoM experience, being involved in design conversations, documentation and foremost content creation.
You will be working closely with the Dev team and Graphic design team.
If you dream of being a game designer who thrives on creating engaging experiences we would like to hear from you!Job Description/Requirements:
- design a wide variety of challenges to suit different skill levels and play styles
- be the go to person for the implementation of interesting content that stretches the capabilities of existing systemsApplicant Requirements and Qualifications:
- Deep familiarity with WoM and with the server/client-side implementation procedures
- Familiar with the visual side of the content
- Advantage if you have been a part of live game project where you have been directly involved in game design
- You are well-versed in games and the ability to articulate what is a strong/weak about the design of existing servers
- Ability to communicate your ideas and collaborate with others (via slack in written form, or via voice chat during meetings or purely creating content prototypes)If you would like to be a part of building a stunning game experience we would love to hear from you.
Please submit your resume and letter of motivation to [email protected] and we will be in touch soon!With regards,
the WoM Team -
Thanks for the praise. We are opening tomorrow at 6pm CEST and excited about it.
-
It's best to develop everything in your own team. Most people creating these "systems" are not professional and don't know how to write reusable code. Most of them opened a server which failed and are hoping to get some money off the time they spent preparing it before quitting because the public didn't understand their genius.
-
1
-
-
Join us now!Official site https://wom3.org
Discord https://discord.gg/5pmthW
Facebook https://facebook.com/WoM3Official
-
9
-
-
The old effects of the skills were still in the Gameforge servers when I started playing. They changed it a few months later in 2008.
-
1
-
-
Why on earth are you compiling the source on debian? Metin2 runs on FreeBSD, also FreeBSD is more stable and overall a better server OS than LInux so I'm not seeing the point of this.
-
4
-
-
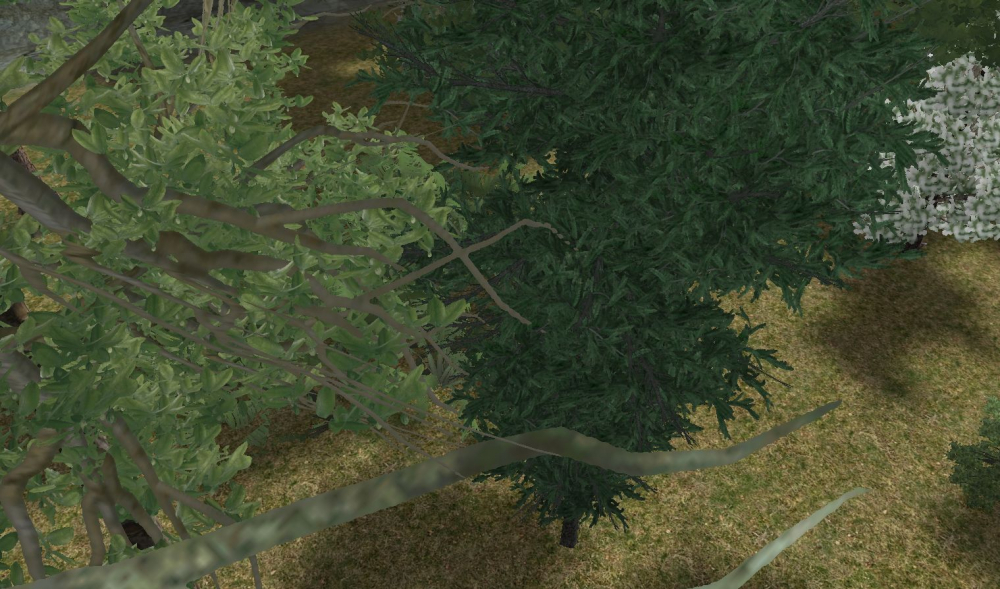
Hello everyone,
Although I may have released these trees from the game Enemy Total War before, they were mostly not working and those which worked had their lighting totally off so they were not really usable.
So today I finally converted all the trees (135), corrected the lighting and changed the color palette of the textures to match the one in Metin2.
Besides normal trees there is also a good number of dead trees, shrubs, and, handy for your christmas maps, lots of snowy trees. There are no fall versions though, all the leaves are green, but you can always open the composite maps in Paint.NET and play with the levels/hue menus.
Spoiler
-
27
-
1
-
1
-
1
-
 1
1
-
11
-
3
-
31
-
-
at which point are you getting that error?
-
Thanks, the video is not mine.


How To Coloring your Shell in FreeBSD ( ZSH / CSH )
in Guides & HowTo
Posted · Edited by Shogun
1. Foreword
If you are like me and enjoy spending time fiddling with FreeBSD, or you want to make it a bit harder to avoid making mistakes because you edited the wrong file or something, it pays off to set up some coloring in your FreeBSD shell. Not for the aesthetics, but to identify easier: who we are (user), where we are (path), and what are we looking at (file coloring)
First let's start with the subject of shells. Zsh is pretty popular among programmers, and it also provides an easy way to do exactly what we want through the Oh My Zsh addon. Oh My Zsh is a package designed to make zsh easier to use; you can head here for more details if you want to know more:
Note that you can use zsh as a root shell, but any Unix admin worth his salt will tell you that root should be using one of the default shells available with FreeBSD, since, if you run into any issue with the shell, you won't be able to su to root, which is pretty bad. So I will also explain how to do exactly the same coloring with FreeBSD's default shell, csh.
Now for the sake of example, let's say we have two users to deal with: root, and the user for our metin2 server which is aptly called metin2 [Note: a sensible approach in such setup is to forbid root from logging in through ssh and do that through the unprivileged metin2 user instead, using su whenever we need root access. I won't talk about this topic here though, just do not forget to add this metin2 user to the wheel group so he can su to root, if you follow this strategy.]
2. Installing Zsh
So let's login as root and install the zsh shell first. We can do it from packages or ports, just stick to one method or you will break dependencies and other nasty stuff.
pkg update
pkg install zsh
Or for ports:
portsnap auto

cd /usr/ports/shells/zsh

make install cleam
Now let's create our unprivileged user if we don't have one yet:
adduser metin2We wil get a bunch of questions, just leave the defaults - ecept for the shell which will be zsh, and in "Invite to other groups?" you should type wheel here, so we can superuser (su) into root.
And of course you would want to type a password, though I prefer using ssh keys for login myself.
That was easy wasn't it?
3. Installing oh-my-zsh
Now let's switch to our new user with:
su metin2Note: Something that annoys me is how the keypad doesn't work in zsh, specifically the / * - symbols which I use all the time. To amend this, you can add the keybindings in this post in .zshrc. Note they may differ depending on your keyboard - press ctrl+v and then the desired key to find out that key's code:
https://superuser.com/questions/742171/zsh-z-shell-numpad-numlock-doesnt-work
Make sure we are at the home directory (/home/metin2) and then proceed to install Oh My Zsh:
fetch https://raw.githubusercontent.com/ohmyzsh/ohmyzsh/master/tools/install.sh
sh install.sh
Yes we can install oh-my-zsh even though we are not the root user; of course it will work only for this user.
Now try logging in a second Putty window to make sure everything works as intended - it's a good practice when we are changing stuff like shells, ssh or firewall parameters, to make sure we don't get locked out of our own system.
4. Setting up an oh-my-zsh theme
Once installed, by editing the .zshrc file found in our home directory you can change the color scheme or theme to any of the ones available - be aware though that the FreeBSD terminal only supports 16 colors by default, so all those fancy Linux ones won't work properly without heavy modification of the environment.
Luckily for you I will provide here my own color scheme perfectly adapted for this amazing operating system, in case you want to use it - just create a new file called .oh-my-zsh/themes/wom.zsh-theme -mind the dot before oh-; paste this on it, save and then set the theme as "wom" in the beginning of the .zshrc file -again mind the dot-.
# WoM2 oh my zsh theme by Shogun
if [ $UID -eq 0 ]; then NCOLOR="red"; else NCOLOR="white"; fi

PROMPT='%{$fg[$NCOLOR]%}%B%n@%m%b%{$reset_color%}:%{$fg[green]%}%B%0d%b%{$reset_color%} $(git_prompt_info)%(!.#.$) '
RPROMPT='[%*]'

# git theming
ZSH_THEME_GIT_PROMPT_PREFIX="%{$fg_bold[blue]%}(%{$fg_no_bold[yellow]%}%B"
ZSH_THEME_GIT_PROMPT_SUFFIX="%b%{$fg_bold[blue]%})%{$reset_color%} "
ZSH_THEME_GIT_PROMPT_CLEAN=""
ZSH_THEME_GIT_PROMPT_DIRTY="%{$fg_bold[red]%}▒~\~W"

# LS colors, made with https://geoff.greer.fm/lscolors/
export LSCOLORS="ExGxfxcxbxegehbhbgacad"
zstyle ':completion:*' list-colors "di=1;34:ln=35:so=32:pi=33:ex=1;31:bd=34;46:cd=34;43:su=30;41:sg=30;46:tw=30;42:ow=30;43"
Now once you are done you can open a new session (either login on a second Putty window if you're unsure about whether your changes could break something, or else just su to the same user again su metin2) and play around with the ls and cd commands to check directory listing and autocompletion are properly colorized.
If you want to make your own theme, you can replace the parameters of the PROMPT (self explanatory), LSCOLORS (directory listing) and list-colors (autocomplete) - for the later two you can get the appropiate strings here:
https://geoff.greer.fm/lscolors/
Note that the brownish color in this tool is actually yellow in FreeBSD, and that to access the second set of 8 colors you should mark "bold" which is not really bold but a different shade of the same color.
5. Shell coloring in csh
Okay time to move to the root user and its default system shell which is a bit less user friendly.
I prefer to get rid of the user specific settings file /root/.cshrc by deleting all the lines on it except for the comments at the start (hint - Ctrl+K in the ee editor deletes the line you're in) and then edit the system wide /etc/csh.cshrc file instead, so the changes apply to all users which use csh.
# $FreeBSD: releng/11.3/etc/csh.cshrc 50472 1999-08-27 23:37:10Z peter $
#
# System-wide .cshrc file for csh(1).
#
# WoM2 theme by Shogun on 31st April 2020

umask 22

set path = (/sbin /bin /usr/sbin /usr/bin /usr/local/sbin /usr/local/bin $HOME/bin)

set color

setenv  EDITOR  ee
setenv  PAGER   less
setenv  BLOCKSIZE       K

setenv  LSCOLORS        ExGxfxcxBxegehbhbgacad
setenv  LS_COLORS       "di=1;34:ln=1;36:so=35:pi=32:ex=1;31:bd=34;46:cd=34;47:su=31;47:sg=31;46:tw=30;42:ow=30;43"

alias h         history 25
alias j         jobs -l
alias la        ls -aFG
alias lf        ls -FAG
alias ll        ls -lAFG
alias ls        ls -G

set     red="%{\033[1;31m%}"
set   green="%{\033[1;32m%}"
set  yellow="%{\033[1;33m%}"
set    blue="%{\033[1;34m%}"
set magenta="%{\033[1;35m%}"
set    cyan="%{\033[1;36m%}"
set   white="%{\033[1;37m%}"

set     end="%{\033[0m%}" # This is needed at the end of the prompt

if ($?prompt) then
        # An interactive shell -- set some stuff up
        set prompt = "${red}%N@%m:${green}%~${white} %# ${end}"
        set promptchars = "%#"

        set filec
        set history = 1000
        set savehist = (1000 merge)
        set autolist = ambiguous
        # Use history to aid expansion
        set autoexpand
        set autorehash
        set mail = (/var/mail/$USER)
        if ( $?tcsh ) then
                bindkey "^W" backward-delete-word
                bindkey -k up history-search-backward
                bindkey -k down history-search-forward
        endif

endif

# Clean up after ourselves...
unset red green yellow blue magenta cyan yellow white end
These settings will result in exactly the same coloring as in my wom theme for oh-myzsh; besides I set ee as the default editor and less as the default pager. Feel free to change these to your liking.
For those curious about the topic I will explain the parts of this file related to coloring, since documentation on the net is pretty sparse about this:
set color enables coloring for autocomplete. Without this, the LS_COLORS line below won't have any effect.
setenv LSCOLORS will define the colors for directory listing (ls) - note that for this to work ls needs to be invoked with either the -G or the -l parameter, that's why we add the alias ls ls -G line. The parameters defining colors here are the same as in oh-my-zsh.
setenv LS_COLORS defines the color scheme for the autocomplete, just like list-colors did in oh-my-zsh. Once again, it works the same way parameter wise. Interestingly, this parameter is used for ls in Linux, hence the confusing naming of the variables.
The set red, green, etc lines are just a helper for coloring the prompt later on the script here: set prompt = "${red}%N@%m:${green}%~${white} %# {end}"
6. Notes
What if we want to use zsh and oh-my-zsh for root as well? In that case you should not install it from the unprivileged user but from root.
And what if we want to install oh-my-zsh for several unprivileged users, leaving root with csh (that's my own setup) - You will notice that if you try to install oh-my-zsh a second time, you will get an error. The way around this is, assuming we are logged in as this other user (let's call it "www") and in its home directory - let's call it /home/www:
unset ZSH

rm .zshrc

rm .zsrhz-local (if exists)
Now you can follow the same steps listed earlier to install it as this user.
7. TL; DR
If you want some prettier colors but can't bother reading this or don't feel confident changing stuff, just copy and paste this on your putty window while you are logged in:
echo 'set color' >> ~/.cshrc
echo 'alias ls ls -G' >> ~/.cshrc
Happy BSDing!