


Nik3y
-
Posts
2 -
Joined
-
Last visited
-
Feedback
0%
Content Type
Forums
Store
Third Party - Providers Directory
Feature Plan
Release Notes
Docs
Events
Posts posted by Nik3y
-
-
On 3/19/2021 at 9:49 PM, ツ said:

You too?
 You want to create a server for our favorite MMORPG?! You will be able to make your dream come true
  ! This guide is exclusively compatible with Metin2 Project. Are you ready?
  Gooo!
Gooo! 
Install the Virtual Machine
Prerequisites
- Download and install the latest version of VirtualBox
- Download the latest version of the Metin2 Project Virtual Machine
- Storage: 25GB
- RAM: 2GB
Introduction
VirtualBox is virtualization software. A Metin2 Server runs mostly on an operating system called FreeBSD. It's therefore necessary to virtualize a second computer within yours to operate your Metin2 Project Server.
It's the virtualization of a second operating system that consumes resources in processor, RAM and storage on the host system, your computer. If you are using a dedicated server, you will install FreeBSD as the main operating system without using Windows!
The Metin2 Project Virtual Machine is ready to use, it's already preconfigured to be usable, even for a neophyte!
Ready? Gooo!
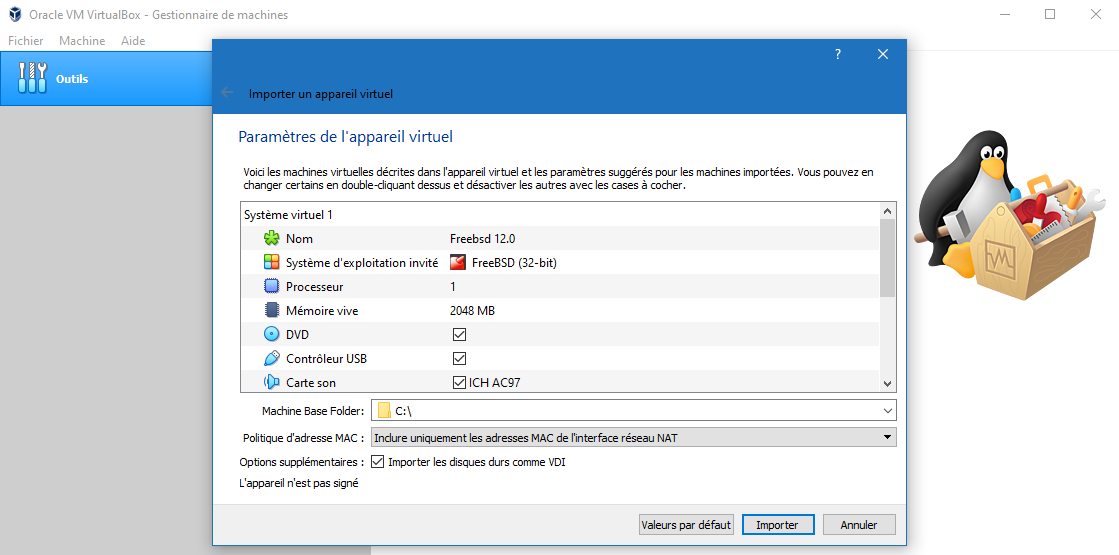
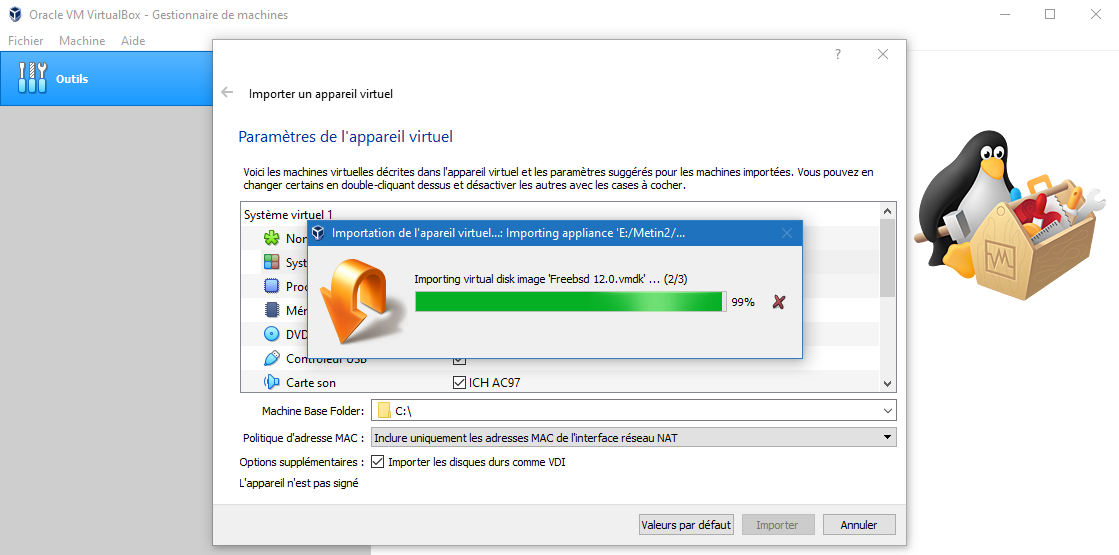
You need to open the « OVA » file by clicking on it, like to open your favorite software. The extension is recognized automatically by Windows and is associated with VirtualBox. You must click on the button « IMPORT » and let VirtualBox work, it imports your Metin2 Project Virtual Machine for your greatest happiness
 !
!
It has successfully imported your Metin2 Project Virtual Machine!
Congratulations !
Configure the Virtual Machine
Introduction
By default, your Metin2 Project Virtual Machine is partitioned into a local network within your computer. This manipulation consists of making your router and your virtual machine communicate and allowing it access to the Internet network.
Ready? Gooo!
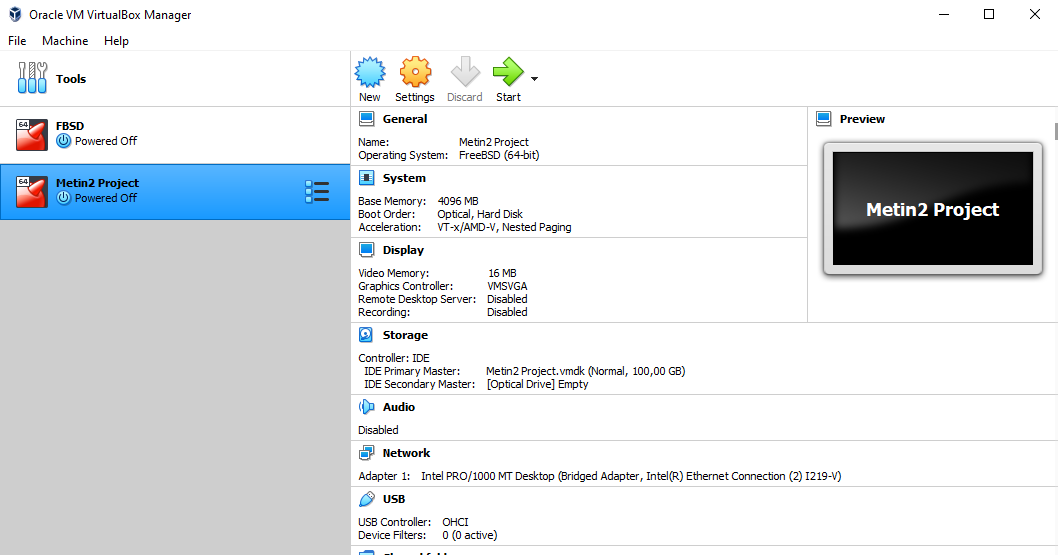
You must click on the name of your virtual machine then click on « CONFIGURATION ». A part that is very important, this is where you give your virtual machine the power to connect to the world and control all of us
!
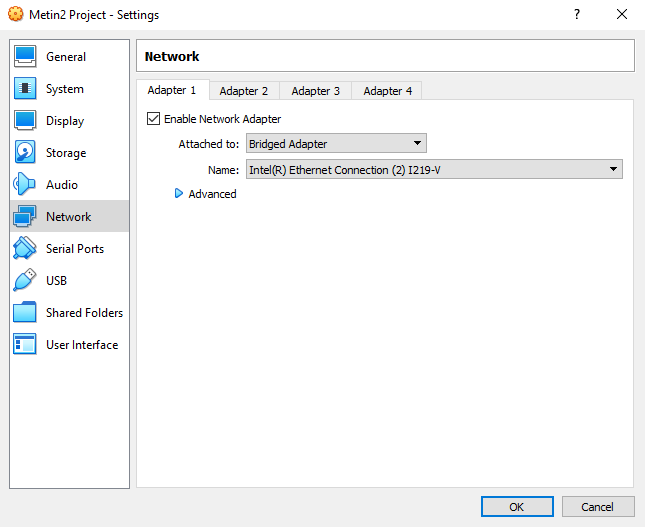
Click on « NETWORK » and choose « BRIDGED ADAPTER » then select the primary network card that your computer uses, « WIFI » or « ETHERNET ». You also have the possibility to modify the various parameters of your virtual machine, such as the RAM, the power of the processor...
Click the « OK » to save the changes.
Manage the Virtual Machine
Introduction
It's important to know how to manage a virtual machine, starting it and shutting it down are actions that you are likely to perform regularly when managing your Metin2 Project Server.
Ready? Gooo!
All you have to do is start your Metin2 Project Virtual Machine
 ! For that, it's very simple you have to right click on the name of your virtual machine and it will offer you several choices including: « START » or « CLOSE » when you want to turn it off.
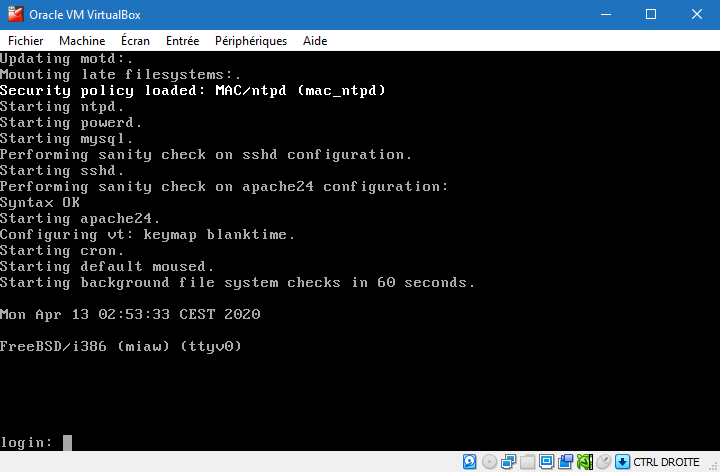
When it has finished starting, you must have this on your screen, you must identify yourself using the identifiers that are available on the topic where you downloaded Metin2 Project, when entering the password it will not be displayed no, this is absolutely normal.
So here you have the main interface between your computer and your virtual machine, it's a bit like your second screen! It must imperatively remain open otherwise it would turn off your computer
 .
.
Trick
It's possible to restart your Metin2 Project Virtual Machine using a command! When you are connected and identified on the VirtualBox interface or using PuTTY, all you have to do is enter the following command then validate with the « ENTER »key on your keyboard:
reboot
Retrieve the IP Address
Introduction
An IP address is like your postal address, if we don't know it, we can't know where you are. An IP address represents the postal address, the location of your Metin2 Project Virtual Machine on your network.
Ready? Gooo!
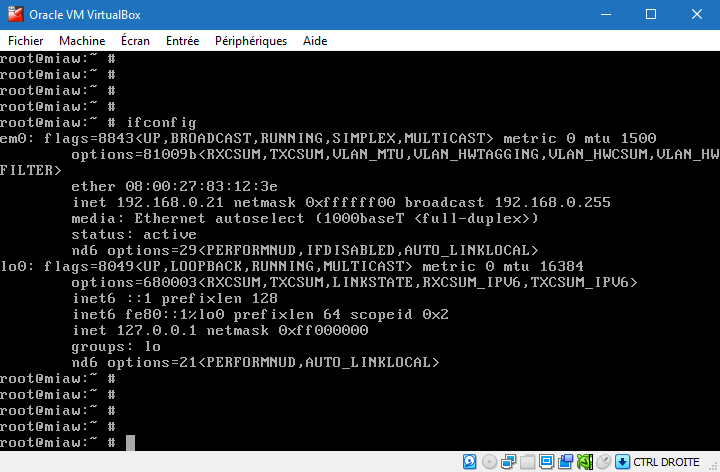
You will retrieve the address of your virtual machine, it has an address, a home and it does not pay rent! This address, which is exclusively numeric is the IP address, it's specific to each computer, whether physical or virtual. You will be able to connect to the various tools to manage your Metin2 Project private server but also to connect to the game!
For that, it's very simple you have to enter the following command in the VirtualBox interface:
ifconfig
In our example, the IP address of the virtual machine is: « 192.168.0.21 ».
Use PuTTY
Prerequisites
- Download the latest version of PuTTY
Introduction
PuTTY is an SSH client, it allows you to connect to your FreeBSD Server in SSH. It's more or less similar to a remote control software like AnyDesk or TeamViewer except that it's used in command line! This saves you the uncomfortable interface of VirtualBox. PuTTY being much more ergonomic for copying and pasting commands...
Ready? Gooo!
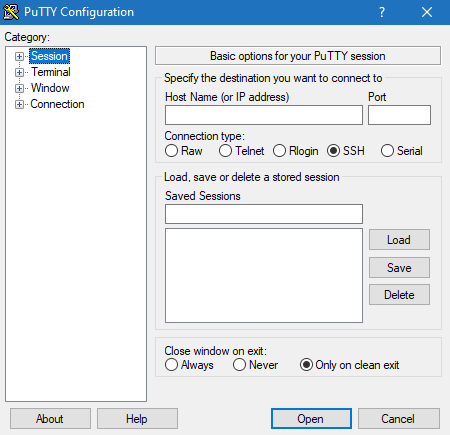
- Enter the IP address in the field: Host Name (or IP address)
- Enter the SSH port in the field: Port (Default: 22)
- Enter a name you want in the field: Saved Sessions
- Click on the « SAVE » button to save the connection parameters
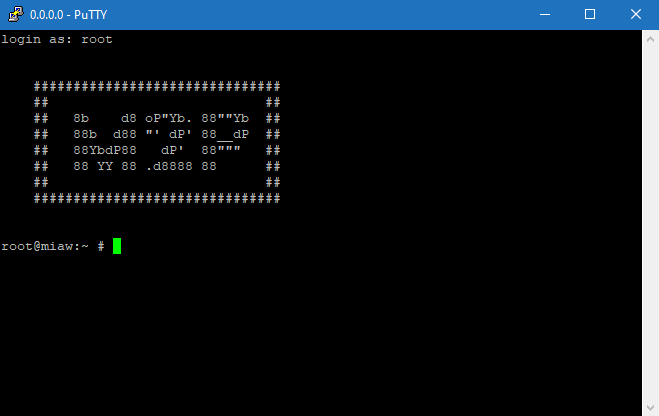
You must double click on the registered server of your choice to initiate a connection. PuTTY will ask you for the username and password of your FreeBSD user, this corresponds to the credentials used on your VirtualBox interface. It may also ask you to confirm the connection to the SSH Server and indicate a security problem, don't panic and click on « YES ».
Use EterNexus
Prerequisites
- Download the latest version of EterNexus
- Download the Metin2 Project Client
Introduction
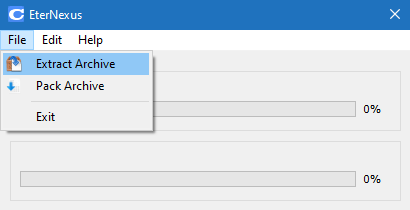
EterNexus is a software which will allow you to decompress and compress the « EIX » and « EPK » archives of the « PACK » folder of your Metin2 Project Client, these archives contain absolutely all the game data, images, texts, models, textures...
Ready? Gooo!
You have to extract the files from EterNexus and move them to the « PACK » directory of your Metin2 Project Client. You will find a folder with the same name of the archive that you unzipped in the directory where the archive is located.
To unzip an archive:
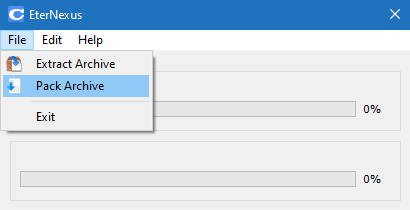
EterNexus will recreate a new archive with the same name of the folder and in the same location where the same directory is located.
To compress an archive:
Configure the Metin2 Project Client
Prerequisites
- Download and install the latest version of Notepad++
- Download and install the latest version of WinRAR
Introduction
It's necessary to link your Metin2 Project Client to your Metin2 Project Server, for this we will enter the IP address of your server within the game client configuration.
Ready? Gooo!
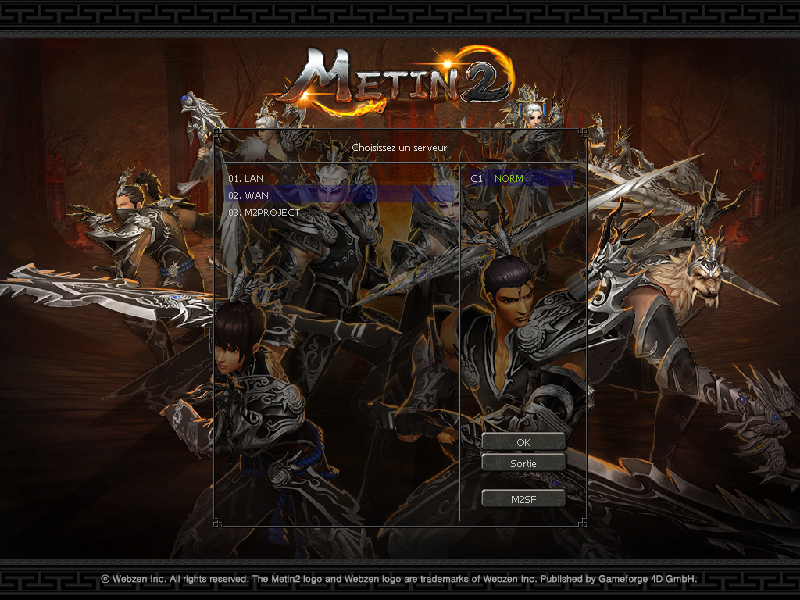
You must first extract the Metin2 Project Client archive. In order to configure your Metin2 Project Client and link it to your Metin2 Project Virtual Machine, you must configure the IP address within your Metin2 Project Client.
You must extract the archive « ROOT » and you will find a multitude of files there, the one that interests us is « SERVERINFO.PY », it contains all the information about your server, the IP address, the name, the port of access...
At the beginning of this file, there is a list of sample servers to guide you through the changes. At the beginning of the file you must find the following block:
SRV_LOCALHOST = {
	'name':'LOCALHOST',
	'host':'127.0.0.1',
	'auth':11002,
	'c1':13001,
	'ids':'10',
}
You need to modify the line similar to:
'host':'XXX.XXX.XXX.XXX',
You must replace « XXX.XXX.XXX.XXX » by the IP address of your Metin2 Project Virtual Machine then save the changes. After that, you simply need to compress the « ROOT » archive. This means that when you run the Metin2 Project Client, you will need to select the « LOCALHOST » server.
Use Navicat
Prerequisites
- Download and install the latest version of Navicat
Introduction
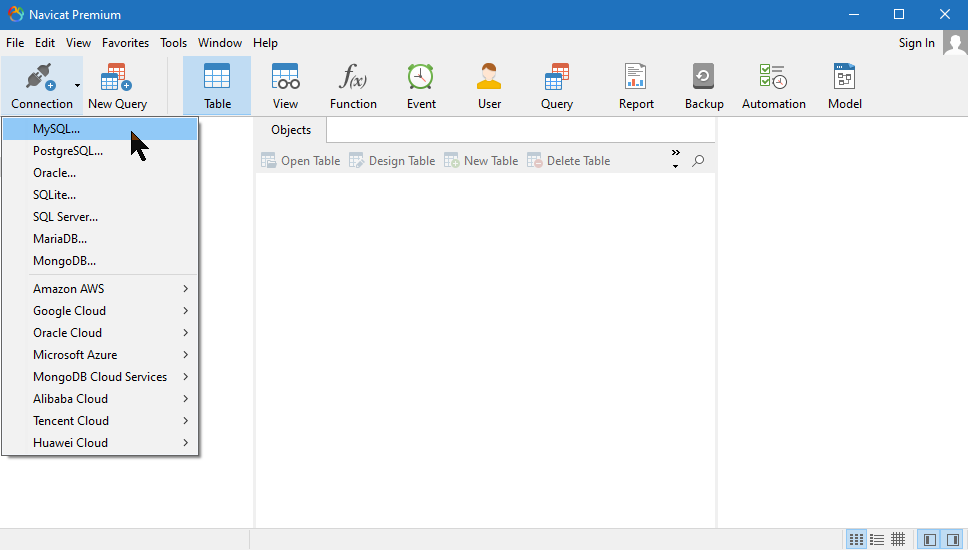
Navicat is a graphical database management and development software suite, it will allow you to manage your databases and the data stored in them. Navicat is not limited to MySQL, it's also able to connect to other SQL Servers such as PostgreSQL, Oracle, SQLite, MariaDB...
As part of Metin2 Project, we use MySQL, the database records and stores all data relating to your Metin2 Project Server, accounts, characters, inventories, state of quests...
Ready? Gooo!
To start the configuration of Navicat, you must click on « CONNECTION » then choose « MYSQL », MySQL is the engine of our database used in Metin2 Project.
Logins are available on the topic where you have downloaded Metin2 Project.
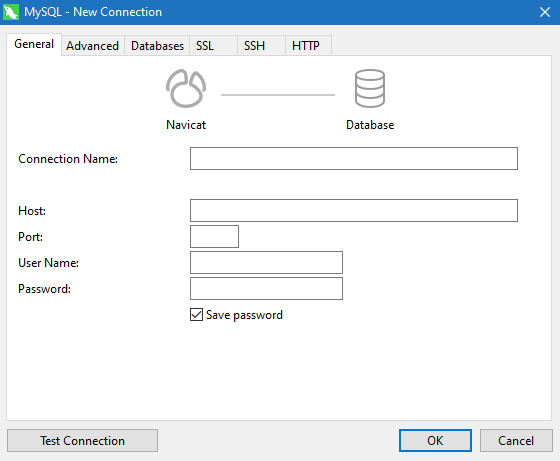
- Enter the name you want in the field: Connection Name
- Enter the IP address in the field: Host
- Enter the MySQL port in the field: Port (Default: 3306)
- Enter the username of a public account in the field: User Name
- Enter the password associated with your user in the field: Password
- Check the box: Save password
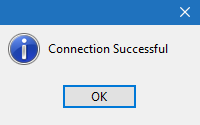
In order to ensure that the connection is established, you can click on the button: « TEST CONNECTION » if you have the message below, everything is good! It only remains to confirm by clicking twice on the buttons: « OK ».
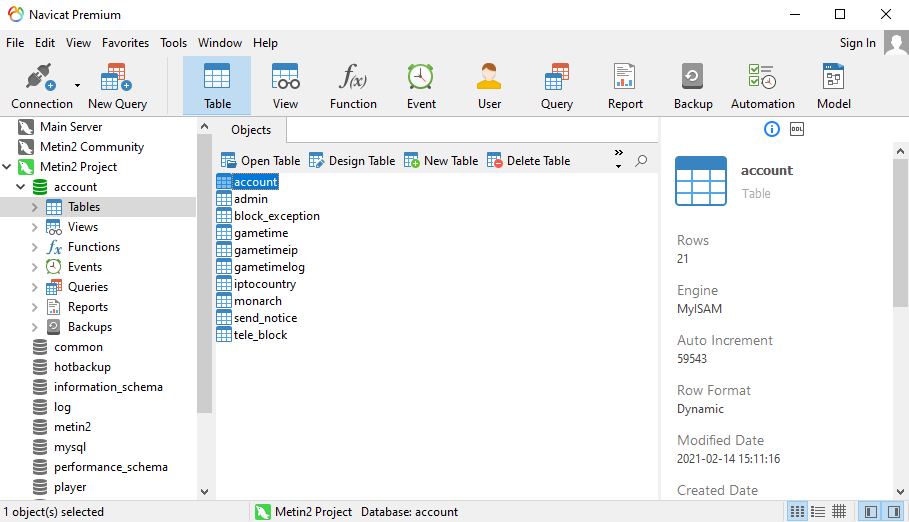
To connect to a MySQL Server, you must double click on the name of the previously added server.
In the left part of Navicat, to see all the data of your Metin2 Project Server you must click on « TABLES ». To open a data table, also double click on it.
Create an Account on Metin2 Project
Prerequisites
Ready? Gooo!
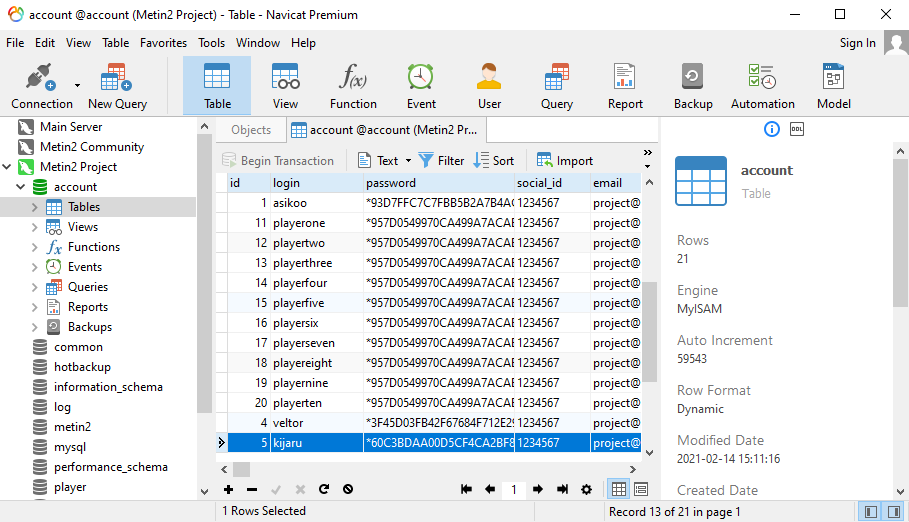
Creating an account on your Metin2 Project Server is easy, for that we will use Navicat to connect to the MySQL Server. We are going to modify the « ACCOUNT » table, it's located in the « ACCOUNT » database.
To manually add an account from Navicat, you must click on the « + » at the bottom left and fill in the boxes, these fields are the most important, everything else is optional and will be filled in automatically with the default settings:
- ID: Do not fill, it fills automatically
- LOGIN: The username of the account we use to connect to the game client
- PASSWORD: This is the password, which you must first encrypt
- SOCIAL_ID: This is the code for deleting a character
- EMAIL: This is the email address of the account
- CREATE_TIME: Account creation date
- STATUS: Account status, « OK » or « BLOCK » if he should be banned
- SECURITYCODE: ?
- AVAILDT: ?
- MILEAGE: DC
- CASH: MD
- GOLD_EXPIRE: Double Drop Chance for Items
- SILVER_EXPIRE: 50% More experience
- SAFEBOX_EXPIRE: More storage space in the Warehouse
- AUTOLOOT_EXPIRE: A Hand that Automatically Picks Up Yangs
- FISH_MIND_EXPIRE: The chance of catching a Fish increases
- MARRIAGE_FAST_EXPIRE: Love points increase faster
- MONEY_DROP_RATE_EXPIRE: Double Chance of Yang Drop
- LAST_PLAY: Last login date
This ensures that your passwords are not in the clear in your database, a measure of security and confidentiality. Finish by pressing the « ENTREE » key on your keyboard to confirm and save.
Assign « GM » permissions
Introduction
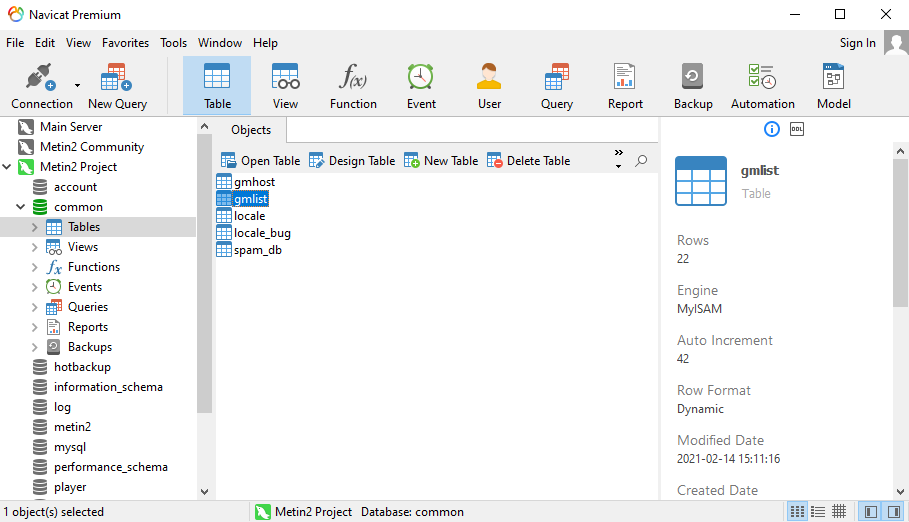
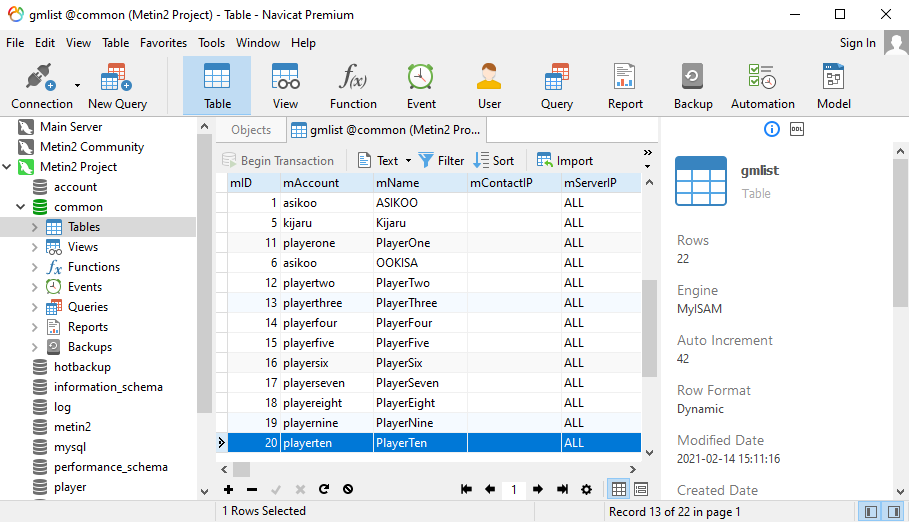
Adding permissions to a user involves a lot of responsibility, for this we will use Navicat to connect to the MySQL Server. We are going to modify the « GMLIST » table, it's located in the « COMMON » database.
To manually add an account from Navicat, you must click on the « + » at the bottom left and fill in the boxes:
- MID: Do not fill, it fills automatically
- MACCOUNT: The account ID the one to use to connect with the game client
- MNAME: This is the name of the character, it must be strictly identical, if it's not yet existing, it does not matter, the important thing here is to choose a name that will be that of your character
- MCONTACTIP: The box is empty by default, however some explanations: this allows the rights to be assigned to an account according to the player's IP address, this prevents someone from connecting to the account to take advantage of the accesses, to be avoided if the player to a dynamic IP address
- MSERVERIP: The box is on « ALL » by default, however some explanations: this is in the case where you have several Metin2 servers running on the same FreeBSD Server, this allows you to assign access to a particular server, it requires adding the server IP in the « GMHOST » table
-
MAUTHORITY: This is the level of access rights in play, you can check the access level of an order from the sources of Metin2
- GOD: Limited access
- HIGH_WIZARD: Limited access
- WIZARD: Limited access
- LOW_BIZARD: Limited access
- IMPLEMENTOR: Full access
Finish by pressing the « ENTREE » key on your keyboard to confirm and save. You have defined the accesses, you must reload them, two solutions:
- You have an account with an already existing GM character, you must write this in-game command and disconnect / reconnect the concerned account: « /RELOAD A ».
- You don't have any GM characters, you have to stop and restart the Metin2 Project Server with the Metin2 Project Shell Manager.
At this stage, the server has not started, the next start of the Metin2 Project Server will suffice to update your character's accesses.
Use WinSCP
Prerequisites
- Download and install the latest version of WinSCP
Introduction
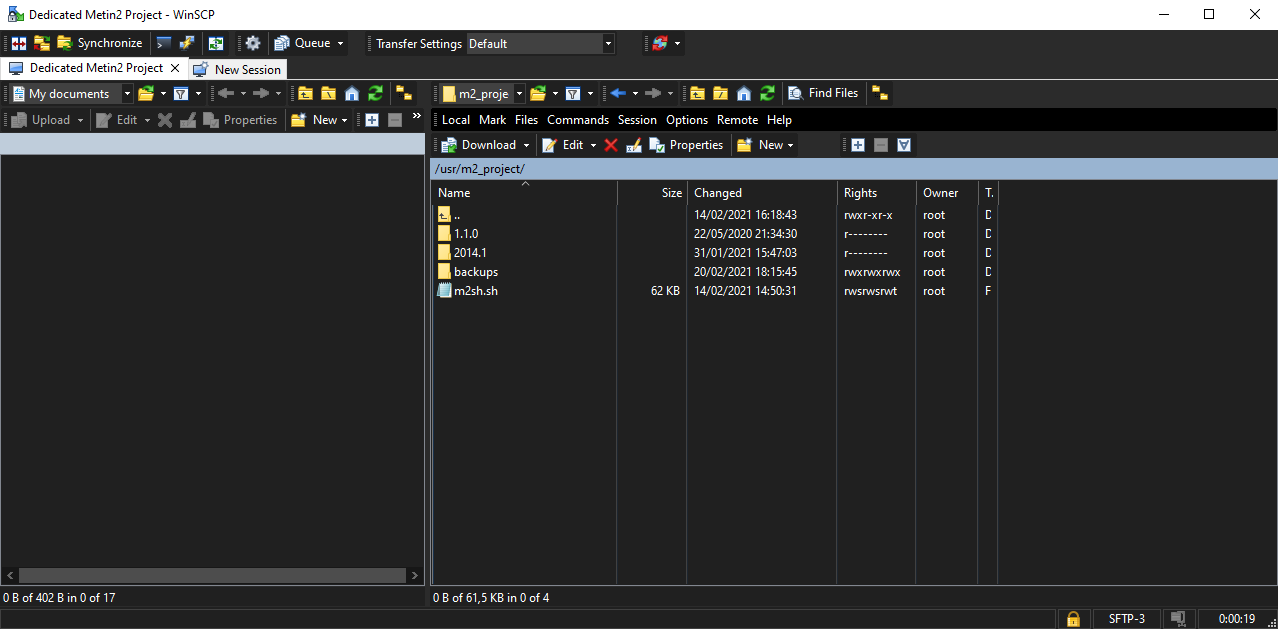
WinSCP is a graphical SFTP client for Windows. It uses SSH and is open source. The purpose of this program is to enable secure copying of files between a local computer and a remote computer. You will use it to transfer files to it.
With WinSCP you will be able to explore the content of your Metin2 Project Virtual Machine as if you were on your computer with Windows and its file explorer. You will find there the files of the FreeBSD operating system, the programs which have been installed, but also, most importantly, the files of our Metin2 Project Server.
Ready? Gooo!
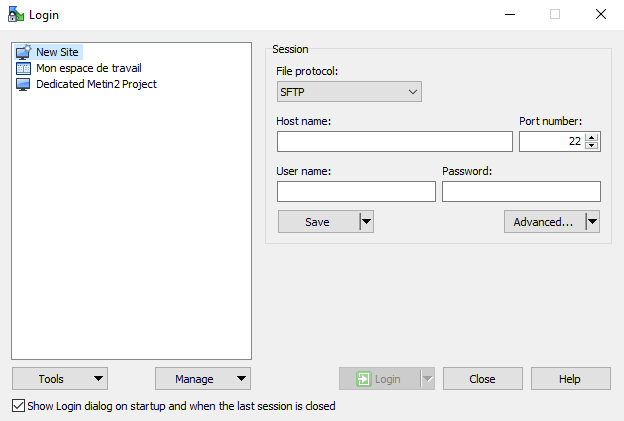
When you open the program for the first time, it automatically offers you the connection manager:
- Enter the IP address in the field: Host name
- Enter the SSH port in the port number: Port number (Default: 22)
- Enter Username: root: in the field: Username
- Enter the password for: root: in the field: Password
- Click on the button: Save...
- Enter the name you want in the field: Save session as
- Check the box: Save password (not recommended)
- Click on the button: OK
To initiate the connection, you must double click on the server you have registered. WinSCP will automatically connect with the username and password that have been registered. It may also ask you to confirm the connection to the SFTP Server and announce a security issue, don't panic, click « YES ».
Start the Metin2 Project Server
Prerequisites
Introduction
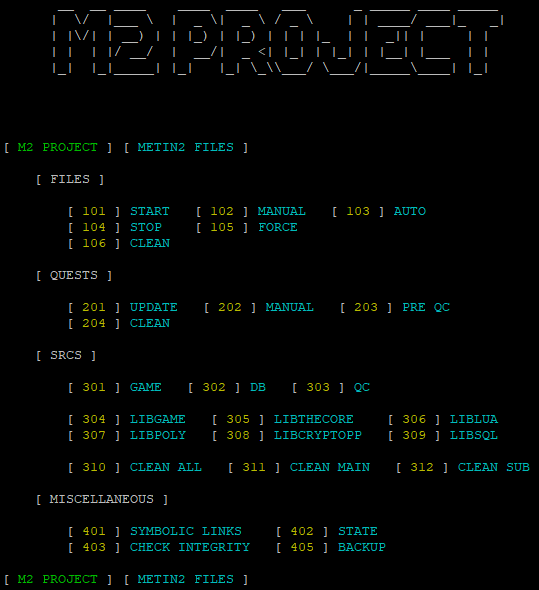
Metin2 Project comes with a powerful program, Metin2 Project Shell Manager. It allows you to manage your Metin2 Project Server with ease!
Ready? Gooo!
To invoke it, you need to run this command on PuTTY:
cd /usr/m2_project && sh m2sh.sh
You have a multitude of options available to you that allow you to manage Metin2 Project as simply as possible. Each time you run the above command, you must choose one of these options by entering it and then validating it with the « ENTER » key on your keyboard.
Enter:
103
Ready? Gooo!
Introduction
It's time for you to materialize in the virtual and wonderful world of Metin2 Project
 ! Enjoy the great and beautiful Metin2 Project adventure...
Made With
 and
and
well hello there! a little question. I want to translate the server in Ro.....i try to modify item_proto,mob_proto, the data base see's them in ro but after a reboot,they all come back in Fr. Please help me to understand what i need to do. I want to try for the first time to make my own server with this resorces. Ty for a eventual help.
-
 2
2
-
 1
1
-
 5
5
-
 1
1


[40250] Reference Serverfile + Client + Src [15 Available Languages]
in Binaries
Posted
Hello guy's. I have a little question for you. After i made the changes in Locale_ro(my languge),translate.lua and item_name,mob_names, i changed theat strange simbols for T and S and the server dosen't start,in FreeBSD panel it's says "Conection refused" as long i keep the server open. I try with DBcompile,questcompile,gamecompile....and othing works. Some Ideea how to fix this? i don't try iet to implement 4inventory and other system cuz im just a bigginer on this things. TY for you help